I always think of seed-starting as a next-level gardening activity, but really, it’s a basic one. But learning how to do it properly can raise your gardening experience to the next level. There are a few tips to successfully growing plants from seed, so let’s take a look at why you might consider it and how it’s done.
The Benefits of Growing from Seed
The bennies are so many, it’s a wonder that not everyone grows everything from seed.
• It saves money. $4 for a small transplant at the garden center, or $2-$3 for a packet of seeds to grow lots of plants? Do the math.
• It’s gratifying. Taking a plant through its whole life cycle is a rush, and doing it with children? It’s a wonder to see it through their eyes.
• It allows for a wider range of plants. Go to the garden center, and you buy what they have. Leaf through a seed catalog, and the sky’s the limit.
• There’s better quality control. I trust my independent garden center to not sell me poor plant material, but let’s be honest — I don’t really know what that plant’s been through before I buy it. Starting my own from seed ensures that my plants are grown the way I want them to be grown.
• You can extend your growing season. Get a head start with your ready-to-go seedlings rather than waiting for what’s available.
What Plants Can I Grow From Seed?
Almost any you can think of, but most gardeners grow veggies, herbs, and flowers from seed successfully. Some are stupidly easy (sunflowers, beans) while others require a bit more finesse (tomatoes or any other tiny seed).
Seed Starting for New Gardeners
In this video Brijette Romstedt, from San Diego Seed Company, shares her best tips on seed starting for new gardeners and the benefits of growing from seeds.
Whether your garden is big or small, make the most of your space with these tips and watch the full Seed Starting for New Gardeners video on the Kellogg Garden Youtube Channel.https://www.youtube.com/watch?v=BdvcWEHO7Ak&t
So How Do You Do It?
It’s pretty straightforward, and you only need a few supplies.
Materials:
- Seeds
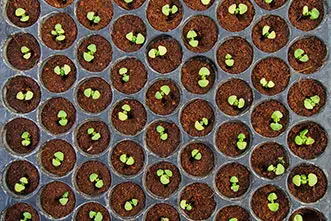
- Seed-starting mix
- Growing tray or containers (purchased plug trays from the garden center, or repurposed containers like empty yogurt or margarine tubs)
- Plastic wrap
- Water
- Lights (actual grow lights or fluorescent lights)
Directions:
1. Clean your containers, rinse, and let dry.
2. Add your seed starter mix and water very lightly.
3. Plant seeds according to the depth indicated on the package.
4. Cover lightly with seed-starting mix, and gently water. Do not overwater.
5. Cover with plastic wrap or the accompanying tray cover to keep the soil moist, and place in a warm location.
6. Check daily for soil moisture, and remove the cover/plastic wrap when seeds start to sprout.
7. From here on out, you will water from the bottom. Place the containers or tray in a slightly larger tray with a bit of water in it — the seedlings will drink from the bottom up, and will be less likely to develop a fungus that could kill them.
8. Place seedling trays by a bright window and use a grow light (such as a florescent overhead light) above. These lights can be several inches above the tops of the plants, and raised higher as the plants grow.
9. After the seedlings have several sets of leaves, it’s time to start slowly acclimating them to the outdoors. Start with a couple of hours per day, gradually increasing their time until they are outside all day.
10. At this point, you’re ready to transplant your seedlings into the garden. Enjoy! You’re officially a Plant Parent.Kellogg Garden OrganicsAll Natural Potting Mix
**Product not available in AZ, CA, HI, NV, UT. For a comparable product in these states click here.